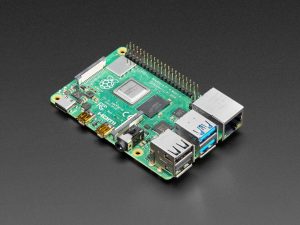
The Raspberry Pi 4 B is the newest version (as of Nov. 2020), with quad coreBroadcom BCM2711, Quad core Cortex-A72 (ARM v8) 64-bit SoC @ 1.5GHz, built in wireless LAN and Bluetooth, with 2 USB 2 ports and 2 USB 3 ports.
See RaspberryPi.org for more details.
You’ll need (not included):
- Micro SD card with NOOBS, the Raspberry Pi OS– NOOBS can be downloaded for free.
- MicroUSB power supply 5.1v, 3 A
And to use it as a desktop computer:
- TV or monitor with an HDMI Connector (use an HDMI to VGA adapter for older monitor)
- HDMI cable
- Keyboard and mouse – It also works with a wireless keyboard
Initial Installation
1. Download from www.raspberrypi.org:
NOOBS, the Raspberry Pi Operating System
2. Unzip NOOBS zip file
3. Using an SD card reader, attach SD card to your computer
4. Copy NOOBS contents to the SD card
5. Put the SD card into the Raspberry Pi and connect to a screen
6. Power up the Raspberry Pi and wait for it to boot up.
7. Follow the instructions on the screen to load the Debian LINUX operating system.
8. Go to “Preferences”,”Raspberry Pi Configuration” to set up your location in “Localization” and
services like Camera, SSH, Keyboard, and change the Pi in “Interfaces”
WiFi
Use WPA2 security for your router. It will not work with less secure WEP
Click on WiFi red icon on upper right and enter the wifi network id and password
 Our Raspberry Pi 3 robot prototype
 Google Voice Kit
Learn Artificial Intelligence (AI) with Google Raspberry Pi kits. We recommend the latest Google Voice Kit shown above sold by Target.com, on-line. Amazon may sell a cheaper Google Voice Kit but it may be an older version without the Raspberry Pi and mini-SD card with the operating system. The newer kit sold by Target is easier to setup.
Here is an video showing the game, Minecraft with the Raspberry Pi. Fun way to learn game programming. We will have more on this soon.
 RaspberryPi.org for lots of fun projects and information.
Raspberry Pi Laptop
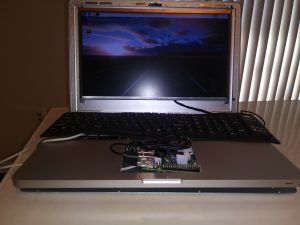
This Raspberry Pi laptop is made from taking out all the electronics out of a broken iBook and adding a LCD screen taken from a broken Dell laptop.
The Raspberry Pi is placed in the compartment created by taken out the touch pad and cutting a small notch with a small hacksaw for the HMDI cable. The HDMI cable goes into the LCD controller board, that is available on Amazon or eBay.
The keyboard is a flexible USB keyboard and I am suing a remote mouse.
I am currently using two power supplies, one 12VDC for the LCD controller and one 5VDC for the Raspberry Pi. I plan to use just one 12VDV power supply and use a voltage regulator for the 5 V needed for the Raspberry Pi.
I may also add batteries to it, since I saved them from the broken iBook and Dell laptop. As it is, it is a lot more convenient using the Raspberry Pi in this setup, saving room and keeping things protected.
It’s not a laptop in the traditional sense, since the keyboard, mouse don’t fit in it and it has to be plugged in for now. It is a convenient way to house the LCD screen and Raspberry Pi, keeping them both protected with a high, tech, iBook, aluminum case.
You can use just about any case from a broken laptop that is thick enough or use the broken laptop, keeping the LCD screen and buying a LCD controller. If it isn’t think enough, you can use it as a work station. It will give you a light, portable, protected LCD screen for your Raspberry Pi.

Here is a close up view of the Raspberry Pi in the iBook shell, case.